Tutorial: How to Set Up a Tattoo Workstation Like a Pro
Are you a beginner looking to learn how to set up a tattoo workstation?
You’ve come to the right place. In this post, we’ll give you advice on setting it up and keeping it clean.
Anyone who wishes to offer tattoo services must create a clean environment. Because tattooing is prone to cross-contamination, it is your responsibility to take serious precautions to protect your clients.
Cleaning requires attention to detail because many workstation parts must be sterilized before the tattooing begins. The more procedures performed, the faster the workstation becomes contaminated by harmful pathogens, implying that cleaning should be done more frequently.
It would be best to address this safety concern at the basic level by dedicating the room solely to tattooing. As long as the service is in progress, the room should not be used for other activities.
This focused approach ensures a clean and controlled environment, enhancing the overall safety of the process.
Now, let’s delve into the essentials you’ll need before setting up your tattoo workstation.
Things You’ll Need Before Setting Up a Tattoo Workstation
Setting up a tattoo workstation requires a certain amount of planning and preparation.
Be aware that each tattoo artist has a unique setting for their workstations.
The following list is meant to serve as a basic guideline, not a substitute for professional advice. You can alter it to suit your tastes and the style of tattooing you desire.
- Tattoo machines: These are, of course, the primary tools used for tattooing. Ensure you have a reliable tattoo machine or multiple machines to accommodate different needle configurations or tattooing styles.
- Clip cord: This is the cable that connects the tattoo machine to the power supply. Ensure you have a clip cord that is compatible with your tattoo machine and power supply.
- Foot pedal: The foot pedal controls the power supply to the tattoo machine. Connect the foot pedal to the power supply and ensure it is functioning properly.
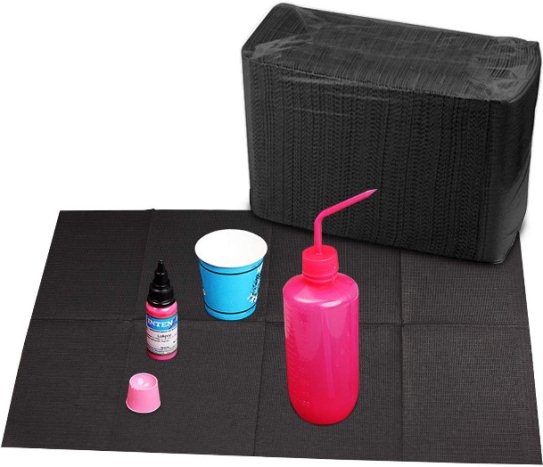
- Green soap: Green soap is a common disinfectant used in tattooing. Dilute it with water in a spray bottle and use it to clean the skin before and during the tattooing process.
- Plastic wrap: Use plastic wrap to cover any surfaces or equipment that may come into contact with bodily fluids, such as the tattoo machine or power supply. This helps maintain a clean and sterile working environment.
- Dental bibs: Dental bibs or disposable bibs can be placed on the client’s chest or other areas to catch any ink or fluids during the tattooing process, ensuring cleanliness and preventing cross-contamination.
- Sharps disposal container: It is essential to have a dedicated sharps disposal container for safe disposal of used needles and other sharp objects. Follow proper procedures for disposing of biohazardous waste.
- Disinfectant spray: Use a disinfectant spray specifically designed for tattoo workstations to regularly clean and disinfect surfaces, equipment, and furniture in the tattooing area.
- Zip lock reclosable bags: These bags can be used to store and organize small items like tattoo accessories, extra needles, or spare parts to keep them clean and easily accessible.
- Disposable razor: Use a disposable razor to shave the area where the tattoo will be applied, ensuring a clean canvas for the tattooing process.
- Tattoo design: Have the tattoo design or stencil prepared beforehand, ensuring it is accurately sized and ready for transfer onto the skin.
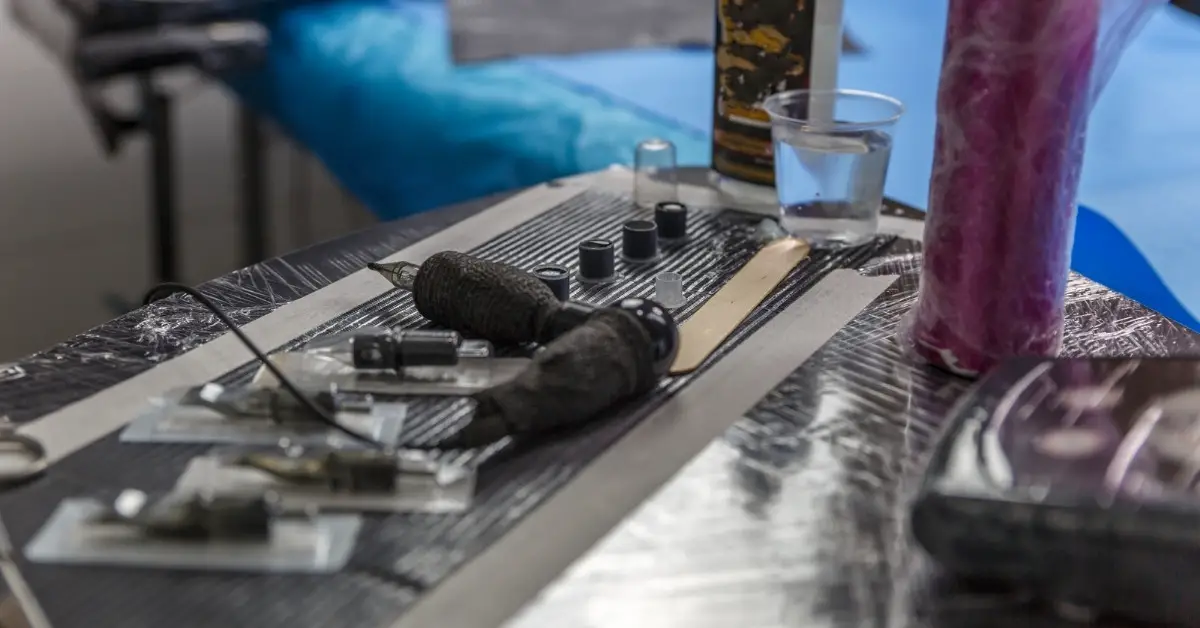
- Tongue depressors: These can be used as ink stirrers or to hold and mix small amounts of ink for tattooing.
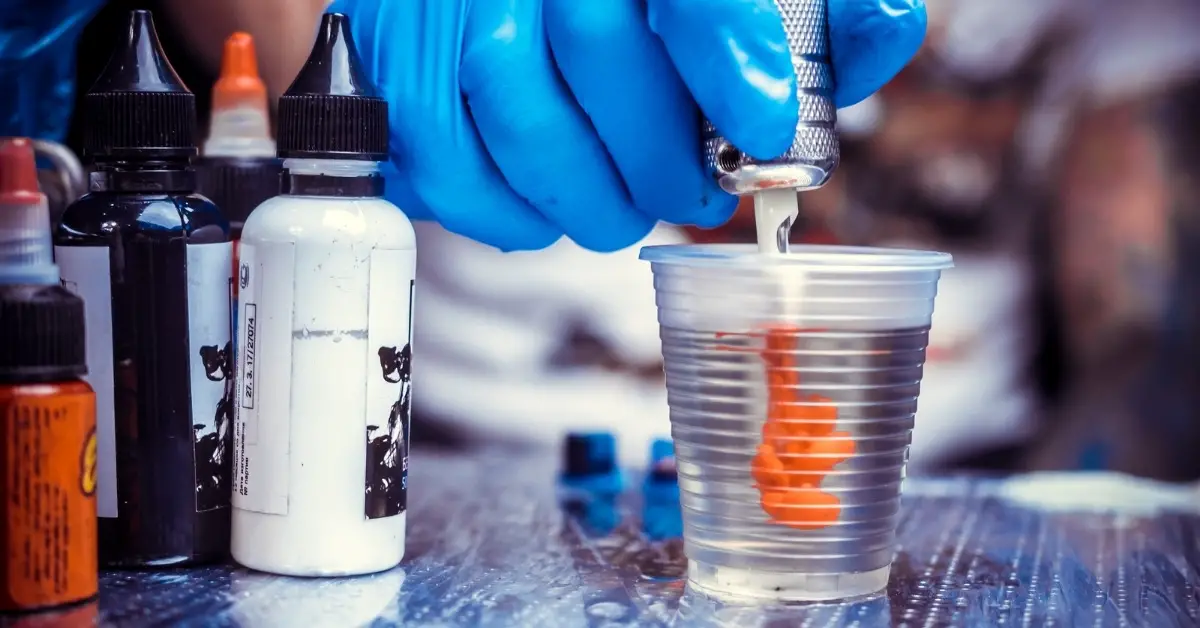
- Ink caps: Ink caps are small containers used to hold the ink during the tattooing process. Prepare an adequate number of ink caps based on the variety of inks you will be using.
- Ink bottles: Have a range of ink bottles available, each containing a different color of ink, based on the tattoo design and client’s preferences.
- Rubber bands and a rubber band jar: Rubber bands can be used to secure the needle to the tattoo machine. Keep them organized in a jar for easy access.
- Pattern transfer agent: Use a pattern transfer agent, such as transfer paper or stencil gel, to transfer the tattoo design onto the skin before tattooing.
- Tattoo aftercare kit: Prepare a tattoo aftercare kit containing sterile gauze, ointment, and instructions for the client to take care of their tattoo once the tattooing process is complete.
- Medical nitrile gloves: Always wear medical-grade nitrile gloves during the tattooing process to maintain a sterile and hygienic environment. Change gloves regularly, especially when switching tasks or touching non-sterile surfaces.
- Task light: Ensure you have adequate lighting in your workspace to clearly see the tattoo area and ensure precision during the tattooing process.
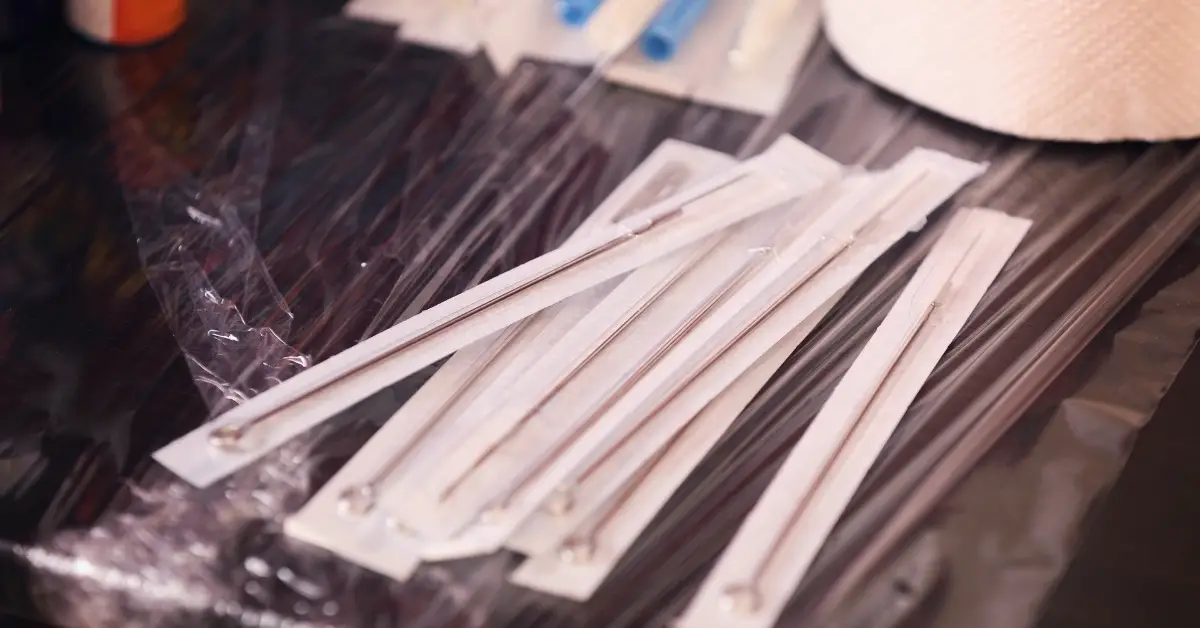
- Tubes that suit the needles you’ll use: Use tubes that are compatible with the needles you’ll be using for tattooing. Ensure they are sterile and sealed until ready for use.
- Needles still sealed in their packets: Keep the tattoo needles in their sterile packaging until you are ready to use them. Open the packets only when you are prepared to attach them to the tattoo machine.
- Roll of paper towels: Keep a roll of paper towels nearby for quick and easy cleanup
- Wax paper: Use wax paper as a barrier or surface to set up your tattooing supplies, providing a clean and easily disposable workspace.
- Plastic cups with water: Prepare plastic cups filled with water. The number of cups should correspond to the variety of ink colors you will be using. These cups will be used to dilute or rinse the tattoo ink as needed during the tattooing process.
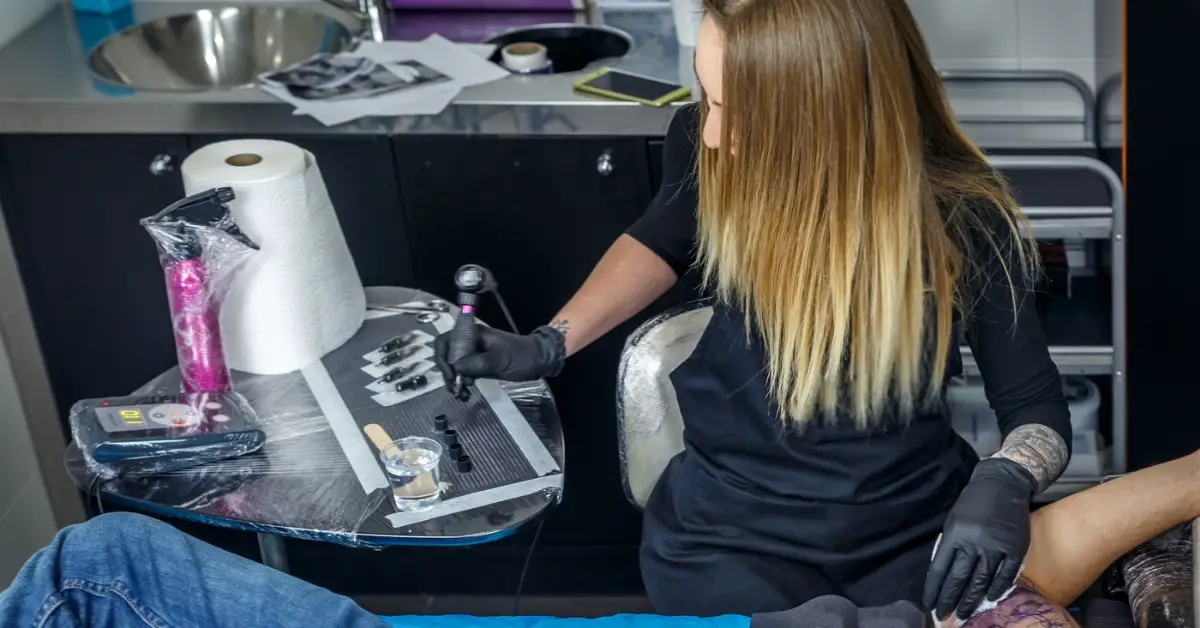
Tattoo Workstation Set Up
1. Use a tattoo workstation with non-absorbent properties. Plastic, glass, and metal are non-porous materials typically safe for this environment.
2. Keep the workstation uncluttered and only essential supplies on it. Other items should be separated and kept in different storage spaces.
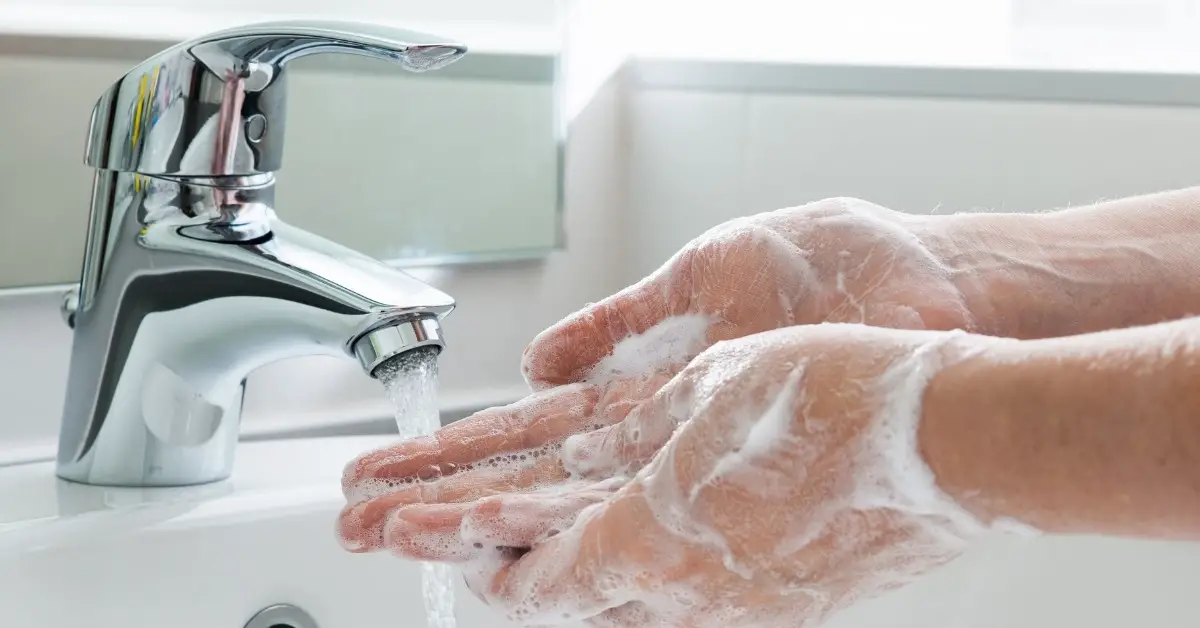
3. Use antiseptic soap to wash your hands. The palms, the areas between the fingers, and the underside of your nails should all be rubbed evenly. It’s also worth noting that longer nails tend to harbor dirt and germs, so keep them trimmed regularly.
4. Put on a pair of medical gloves. Remove them from the box and discard the already used ones. You can also hang a dispenser on the wall to easily access these disposable gloves. It’s also a good idea to put a trash can next to it. These protective gloves should only be used once. Toss them out once you’re done cleaning.
5. To protect against disease-carrying microorganisms, spray surfaces with a disinfectant. If you want to buy it online, make sure it’s labeled medical-grade. This label certifies that a product meets medical applications’ quality and safety standards. After spraying, allow it to sit for 5 to 10 minutes before wiping it away with a clean paper towel.
6. Clean all other tattoo supplies thoroughly with the same agent and water, including bottles, trays, and other essential items you use during the tattooing session.
7. If you have liquid containers that you frequently use to the point where they need to be refilled, simply fill them to capacity the first time. This eliminates the need to fill them multiple times, increasing contamination risk.
8. Use plastic wrap to protect surfaces, especially those you frequently touch. Examples include where the task lamp, power supply, and bottles are displayed. The wrap can also be used to protect electronic devices. It acts as a barrier to keeping sanitized parts sterile throughout the process.
9. A dental bib is another useful item for protection. It can be placed on top of the workstation, knowing that it will be a crowded space once everything is placed on it. This item is normally used to shield patients from liquid spills. However, because tattoo artists often work with ink, it makes sense to use them in a tattoo shop. And because of their porous nature, dental bibs can help reduce the risk of staining.
10. Take a few paper towels from the roll. To avoid touching it again while the procedure is in progress, grab a few handfuls. This also helps to reduce contamination risks. In case you accidentally touch the roll with dirty gloves. In that case, it’s best to assume it’s no longer hygienic because contaminants were transferred through direct contact. Simply throw it away and replace it with a new one.
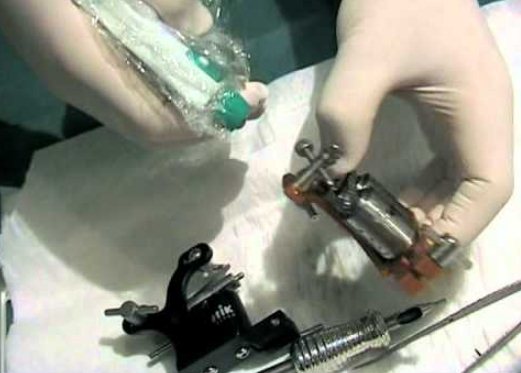
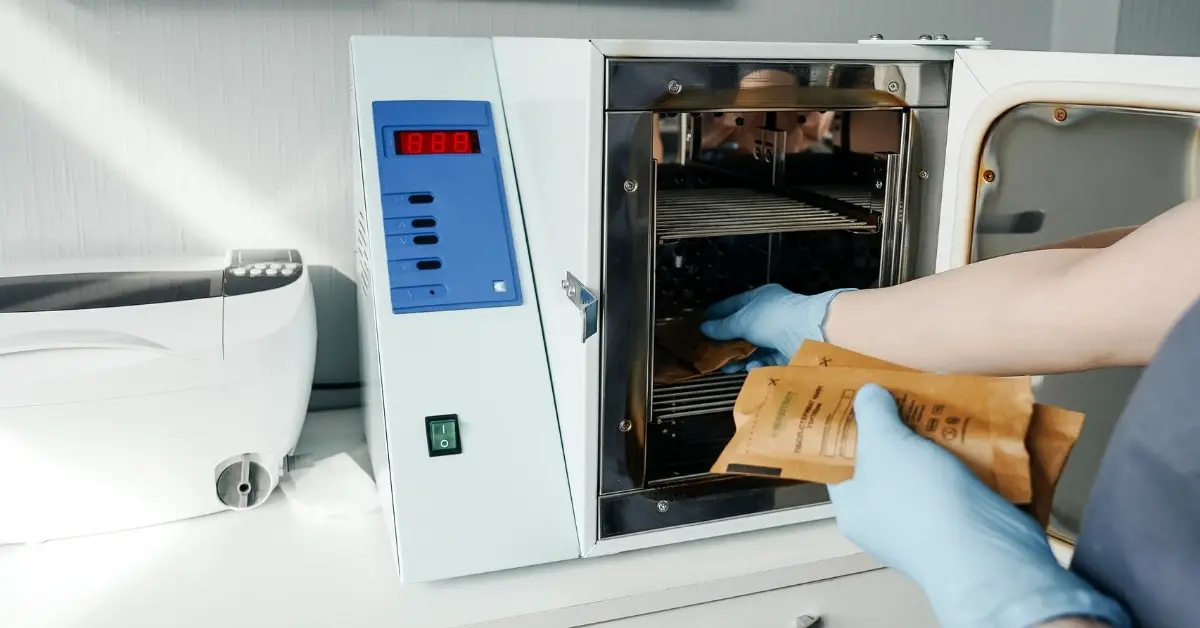
11. Another thing to remember is that tattoo machines should only be used while wearing gloves. Sterilize them using the recommended method, such as an autoclave, after being cleaned. After that, store them in sealed bags until you’re ready to use them again.
12. As you’re waiting for the next client, ensure that all tattoo supplies are ready on the workstation. Remember to place some dental bibs beneath the supplies. Also, if the procedure comes in blister packaging, don’t rip it open before the process begins. This is done to reassure clients that the equipment is brand new.
13. Keep a disposable container nearby, but not near the essentials. To prevent needles from poking through, they must be puncture-resistant. You can avoid the hassle by purchasing one designed for sharp objects.
Setting up your tattoo workstation requires careful organization and attention to hygiene. Ensure all equipment is properly sterilized, dispose of sharps safely, and maintain a clean and sterile environment throughout the tattooing process.
Following these guidelines will help create a professional and safe tattooing experience for both you and your clients.
Wrap Up
As a tattoo artist, you are responsible for your client’s safety. Not only do they deserve it for the money they paid for the service. But, more importantly, you don’t want your business license revoked because something bad happened to your client due to your poor business practices.
That’s why it’s so important to follow tattooing best practices and government rules when running a tattoo parlor.
Aside from hygiene, knowing what to put on your workstation can help you work more efficiently.
And because certain items may not be required based on your requirements, not all are supposed to occupy the tabletop. Please review the list we provided above and select the ones you use the most.
Hopefully, after reading this article, you now understand how to set up a tattoo workstation. It takes time to get used to it, but since it is a repeated process, we are confident you will improve over time.